
Woodcraft Nests
I love this time of the year, there’s so much promise and hope. With each day there’s more light, warmth and growth. These little nests are a lovely project for older children (and big kid adults!)
They’re great for testing out basic wood skills and picking the perfect fibres to weave helps children learn more about the natural world. Guide them to forage things which are sustainable and remember the rule of an honourable harvest, never pick more than 30% of each plant and try to give back what you do take by planting or tending to the earth.
I’d love to see your finished nests, please be sure to share them #athomewithkith or email them over. Enjoy!
Materials Needed:
A wooden disk (or a saw an a piece you’re able to take a wood disk from)
10-15 thin, sharp nails
A hammer
Secateurs/Scissors and a foraging bag
Fibres you can weave with such as…
Grasses (dry or green)
Reeds/rushes
Thin, flexible twigs
Sticks
Yarn
Long leaves
Carded wool/hand spun roving
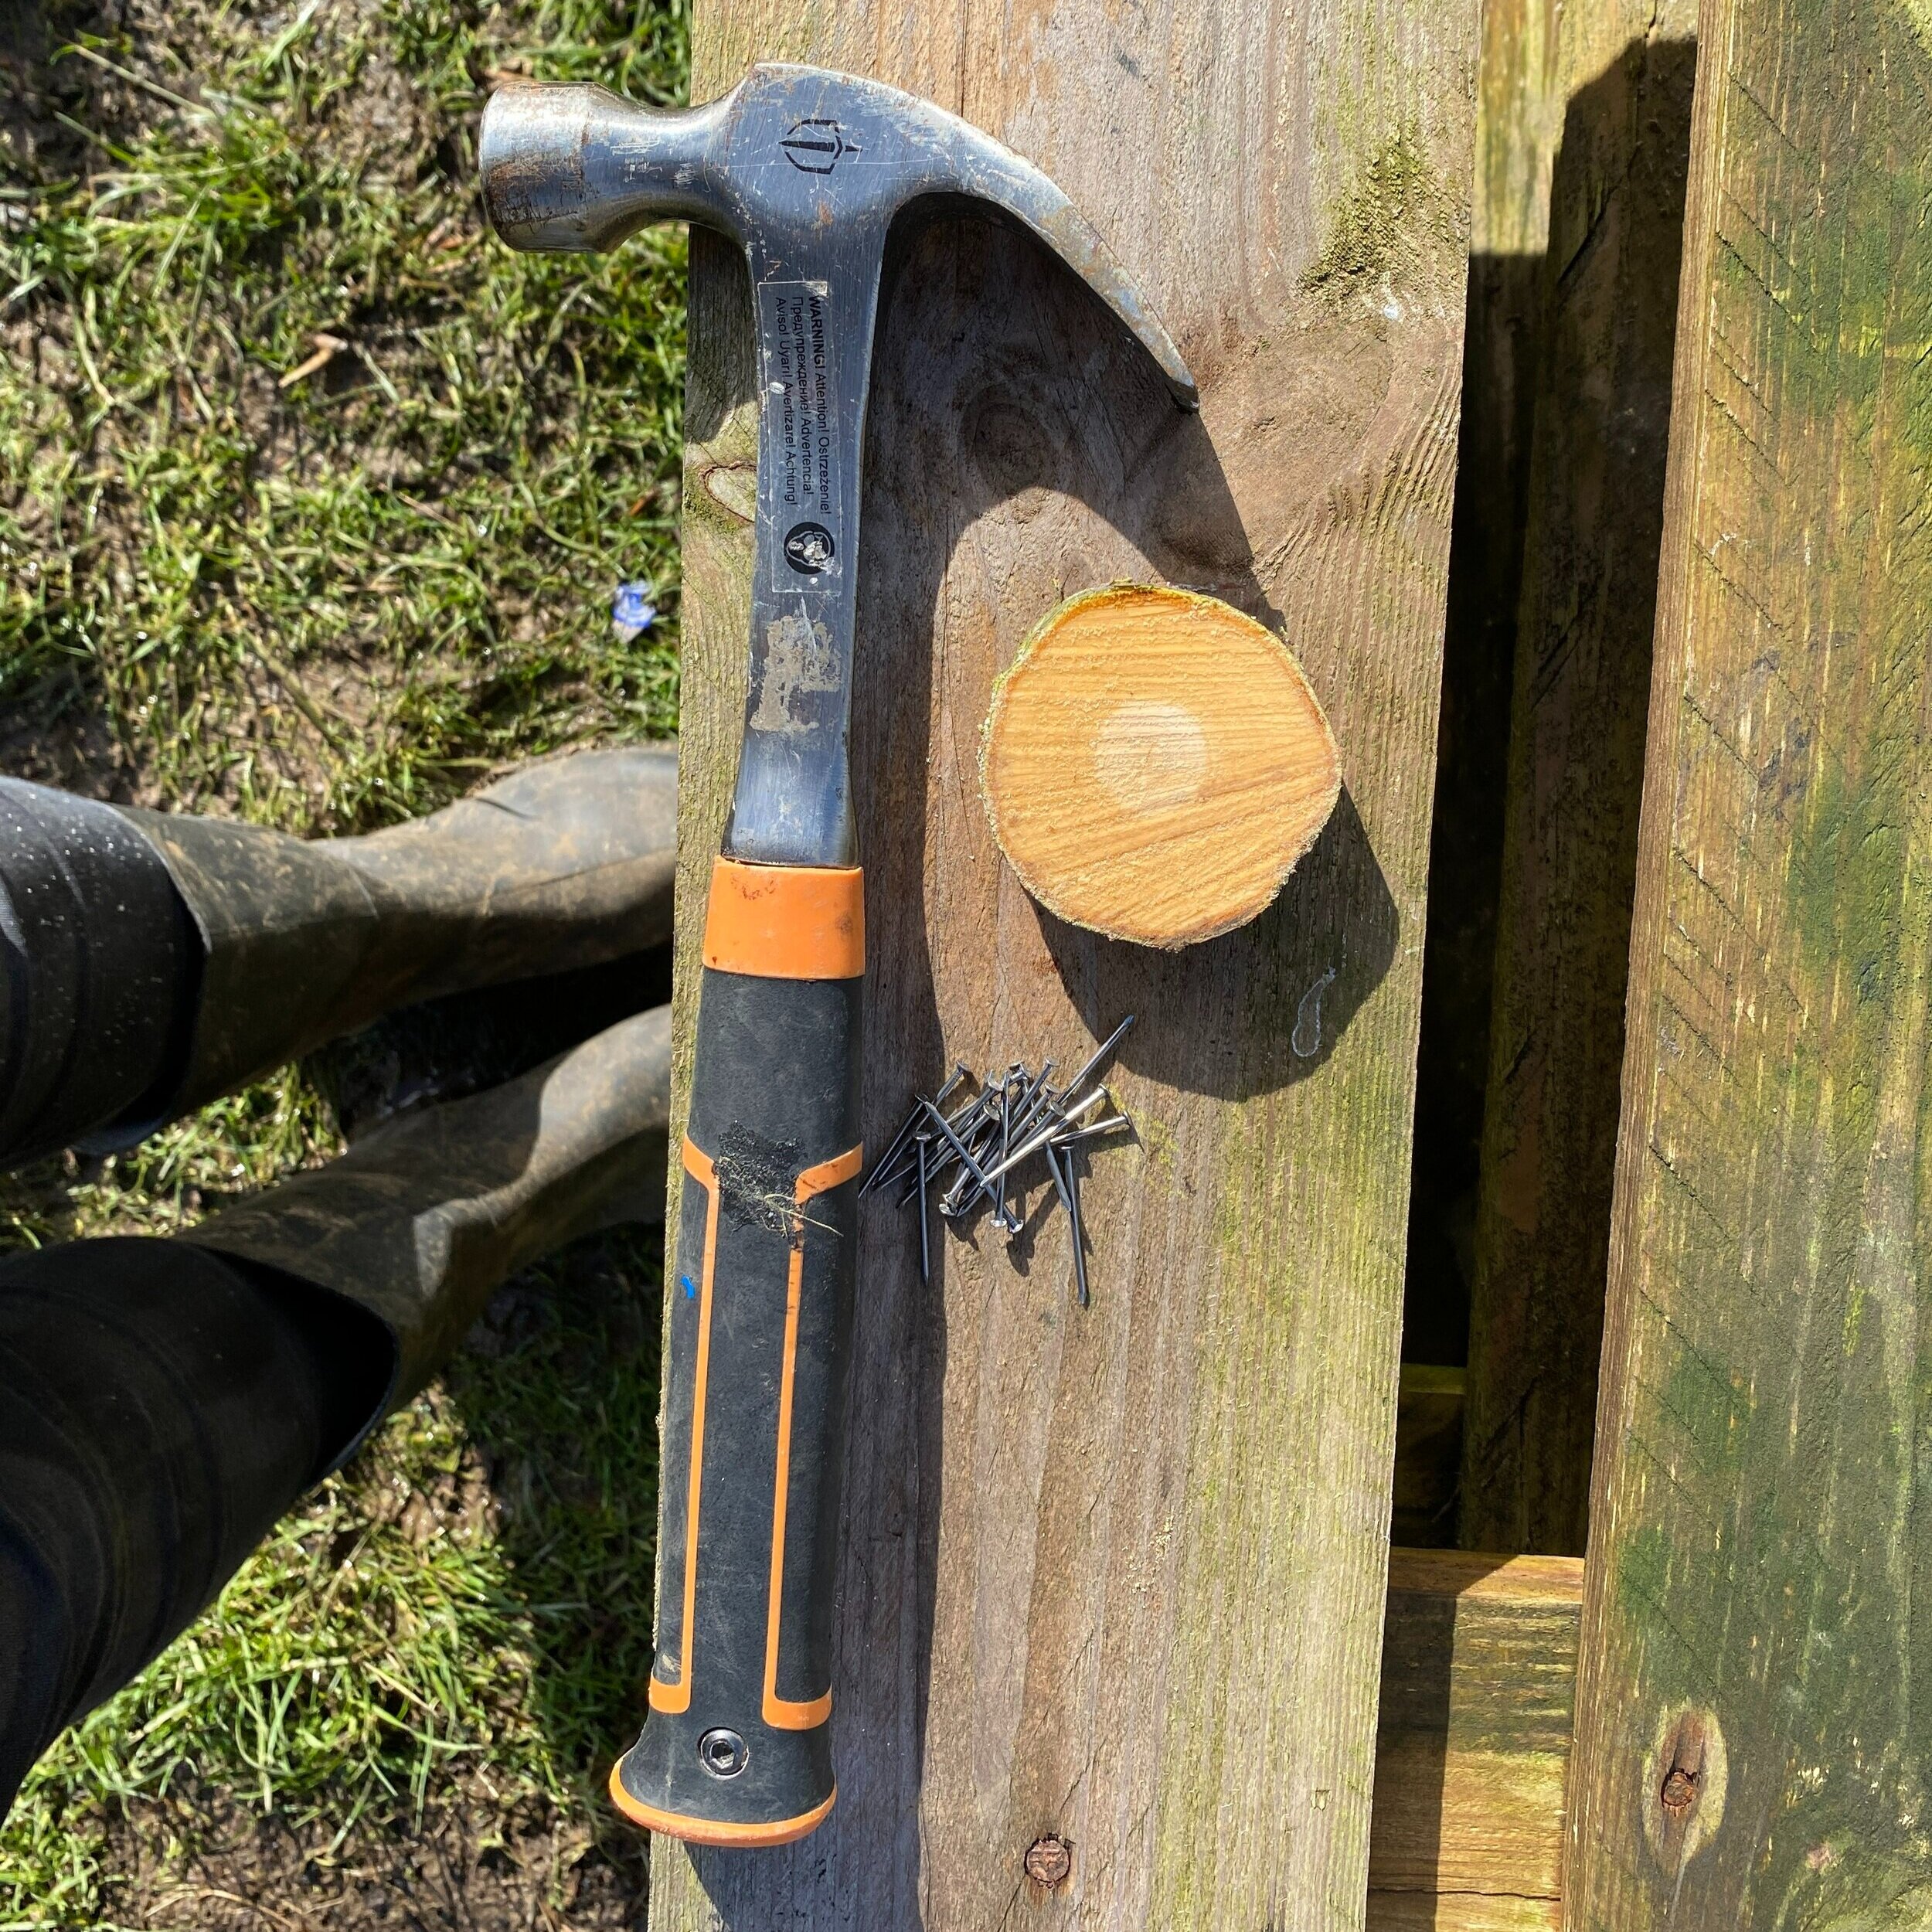
Gather your tools and equipment together. If you’re using a pre-made wood disk, you’re ready to go.
If you’re cutting your disk, be sure to cut it thick enough so the nails don’t split the sides.

If you’re working with children, you can use a pencil to mark where you’d like each of the nails.
If you’re feeling brave, go for it. Hammer each nail in where you’d like the final circle of nails to be.

Once you’ve hammered in all your nails, it should look like this.
Each nail should feel secure and give you enough height to weave your fibres with.
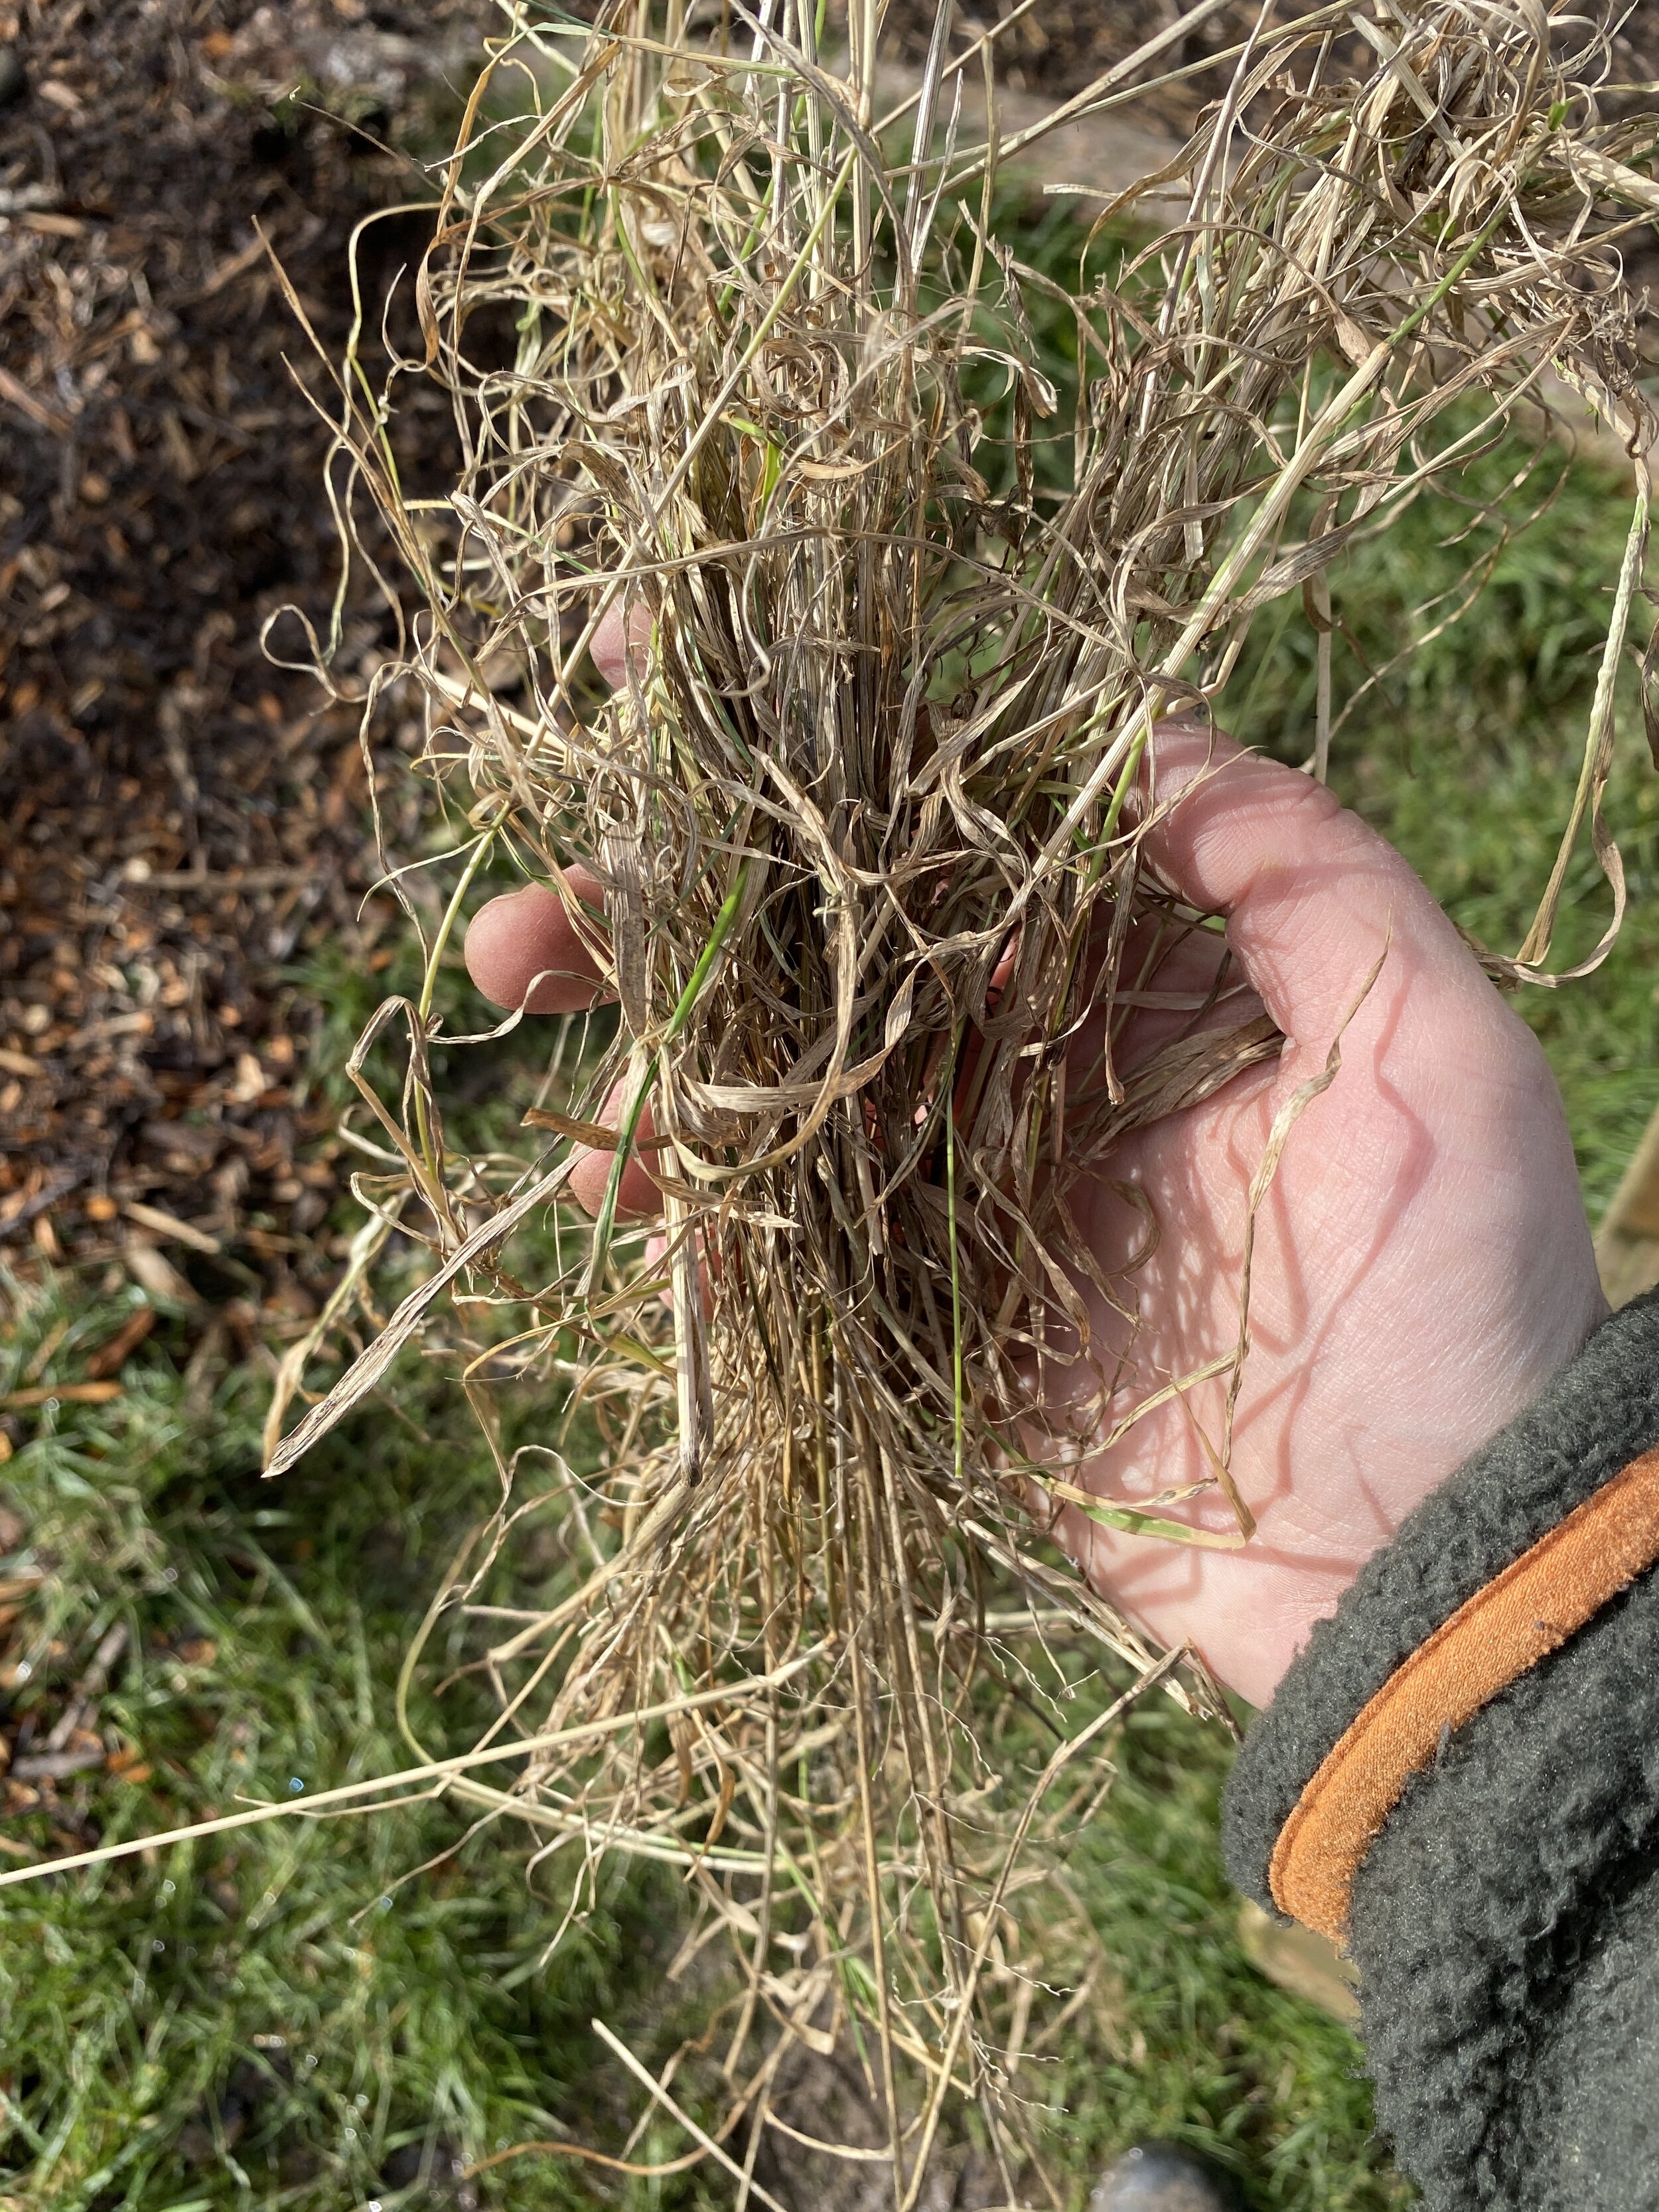
I found these lovely dried grasses tucked by the side of a fence. They’re long enough to weave all the way around, still flexible and strong enough not to snap when manipulating them round the nails.
Together with your little one, or if you’re out and about on your own, see if you’re able to spot things which you think may work.
Thicker fibres will take up more room, thinner are likely to snap, too rigid and they’ll not bend around the nails, there are lots of factors but the beauty of this is to… play!
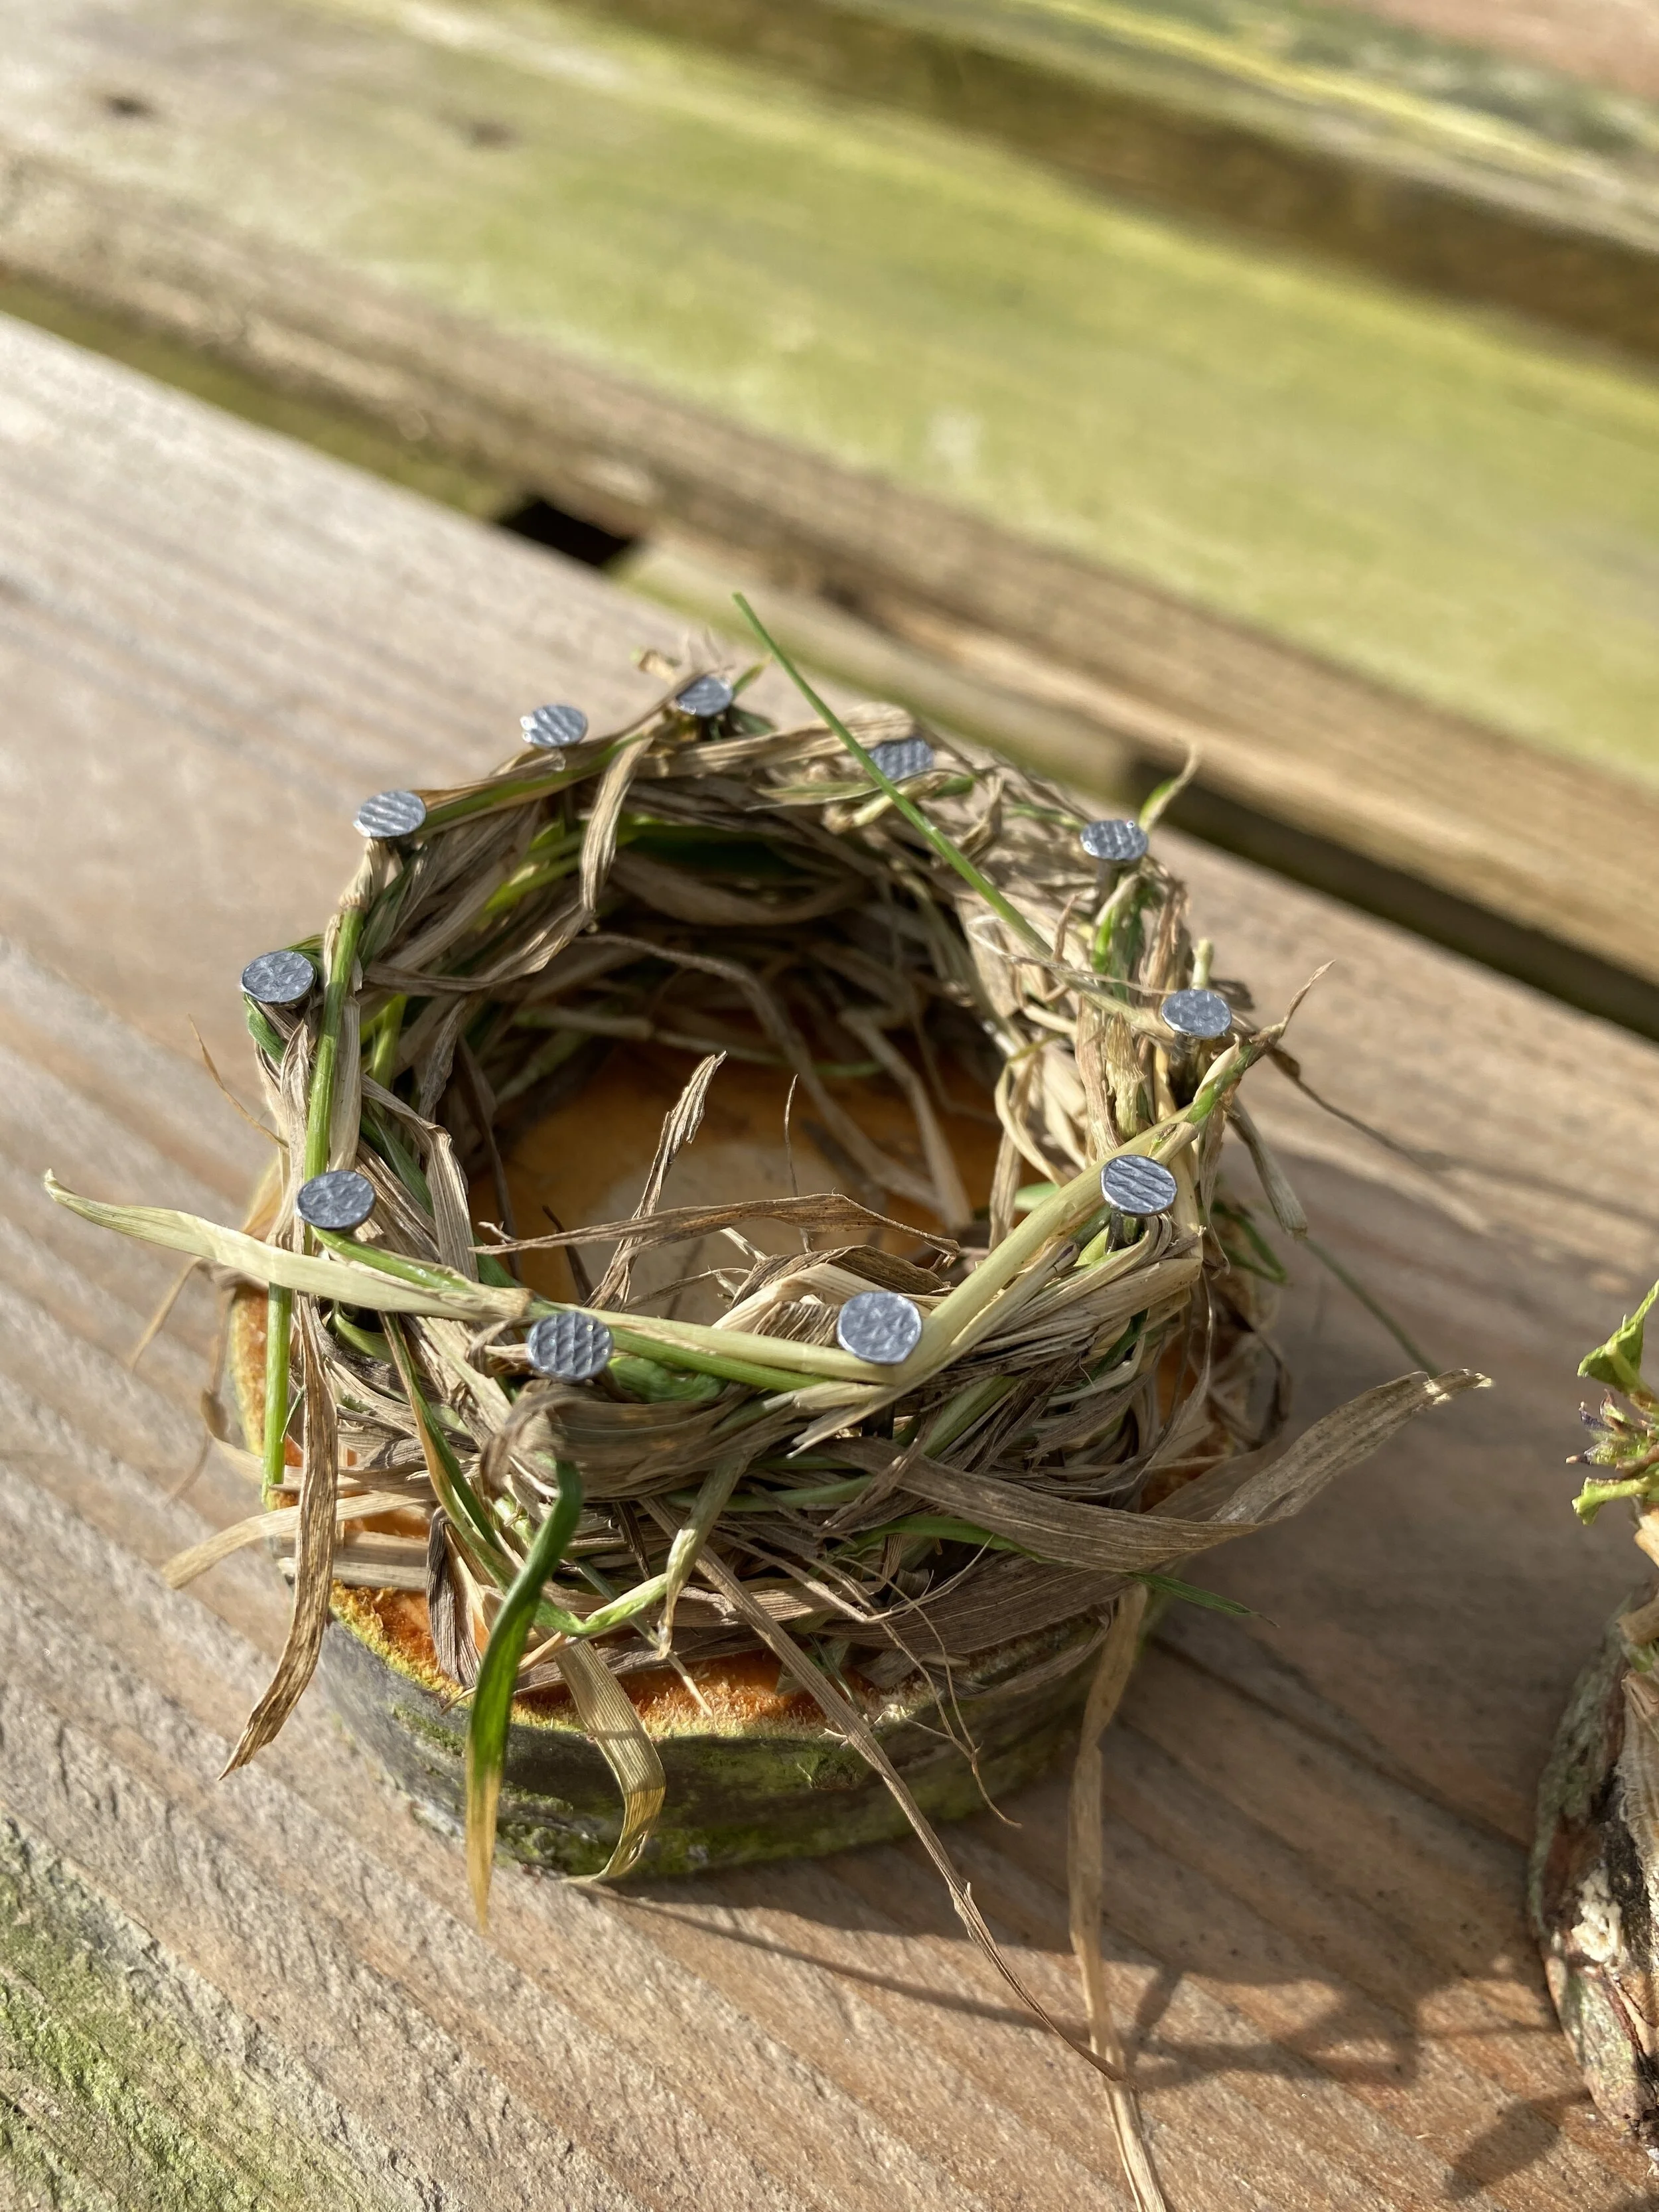
I love the whimsy of this one, stray grasses poking out the sides and the beautiful greens and oat colours.
To weave your fibres, simply pass one strand in front then behind each of the nails. Where your piece ends, overlay the next one so there’s no gap. Longer pieces will spiral making the sides higher and higher.
Tuck in the end and trim any pieces you’re not happy with.

And you’re finished!
You can add mosses, leaves, more twigs, or even make a simple bed for a fairy with beautiful material scraps. There are so many options for this beautiful little piece, let your curiosity run wild.